


Views: 0 Author: Site Editor Publish Time: 2025-08-19 Origin: Site


You need to follow strict safety rules when you put in a CSST gas line. Only a trained expert or licensed worker should do CSST installation. If you do it wrong, it can cause big dangers like fire or gas leaks. Secure the line every 4 to 6 feet and keep it at least 6 inches from heat. Always use approved parts, check that fittings are tight, and follow local building codes. Read the manufacturer’s instructions and plan inspections to keep your gas system safe.
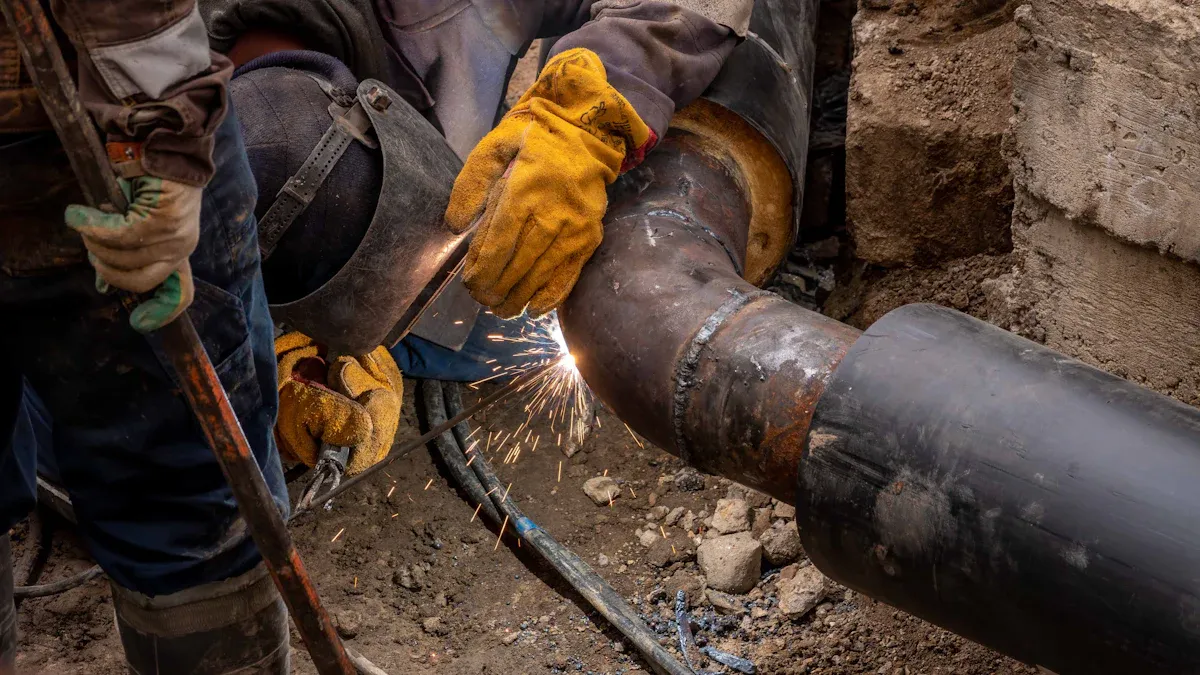
You should always hire a trained expert or licensed professional. This helps stop dangerous leaks or fires when installing CSST gas lines.
Use only approved materials and tools. Make sure to secure the gas line every 4 to 6 feet. Keep the gas line at least 6 inches away from heat sources.
Bond and ground the CSST gas line the right way. This protects your home from electrical surges like lightning.
Check your local building codes before you start. Get the right permits and schedule inspections. This makes sure your installation is safe.
After you finish installing, test for leaks very carefully. Use soapy water or leak detection solutions before you use the gas system.
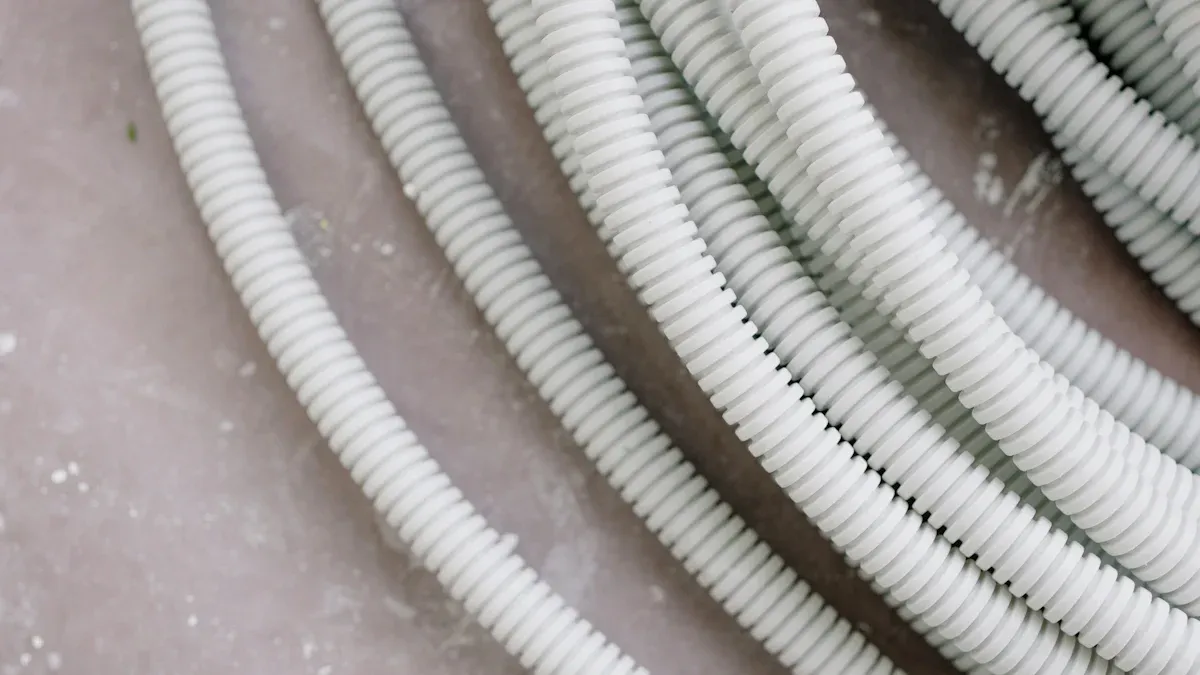
You may wonder what a CSST flexible gas line is and why it matters for your home. CSST stands for corrugated stainless steel tubing. This type of gas line uses a flexible stainless steel tube with a protective jacket. You use a CSST flexible gas line to carry natural gas or propane throughout your house. You can run this line through walls, ceilings, attics, and other spaces.
A CSST flexible gas line connects to a central manifold. From there, you can route the line to different appliances. You do not need to cut and fit many rigid pipes. You can bend the CSST flexible gas line by hand to fit around corners and obstacles. This makes it easier to install than traditional black iron pipe.
Tip: Always bond and ground your CSST flexible gas line. This step protects your home from electrical surges, such as lightning, which could damage the tubing.
You should not confuse a CSST flexible gas line with short appliance connectors. Those connectors only link a single appliance to the main line and do not need bonding.
A CSST flexible gas line offers many advantages over rigid piping. Here is a quick comparison:
Feature | Traditional Rigid Gas Piping | CSST Flexible Gas Line |
|---|---|---|
Installation Difficulty | Hard, needs many fittings | Easy, bends around obstacles |
Flexibility | Rigid, hard to route | Highly flexible |
Corrosion Resistance | Can rust | Stainless steel resists rust |
Weight | Heavy | Lightweight |
Labor Cost | High | Lower |
You save time and effort with a CSST flexible gas line. You do not need to cut drywall or use many fittings. The line is light, so you can move and install it without help. The stainless steel tubing resists corrosion, which means your gas system lasts longer.
A CSST flexible gas line also improves safety. The protective jacket and proper bonding reduce the risk of fire from electrical surges. You get a reliable gas supply with fewer leak points because you use fewer fittings.
A CSST flexible gas line is a smart choice for most homes. You get a safe, flexible, and long-lasting way to deliver gas to every room.
You need special tools for a safe CSST gas line installation. First, gather these important items:
Use a tubing cutter or rotary pipe cutter. These tools make clean cuts on corrugated stainless steel tubing.
Adjustable wrenches help you tighten fittings and connectors.
Pipe thread sealant or gas-rated tape is for threaded connections.
A tape measure checks the length of each line and connector.
Pipe supports and anchors hold the line every 4 to 6 feet.
Use a flashlight or headlamp when working in dark places.
Leak detection solution or soapy water helps you find leaks after installation.
Tip: Always pick tools made for gas line work. This keeps the tubing and fittings safe from damage.
You must use approved materials and safety gear for CSST gas line installation. Big manufacturers want all parts to meet strict safety rules. Here is what you need:
Corrugated stainless steel tubing made from ASTM A240 Type 304 stainless steel. This tubing does not rust and stays strong and flexible.
A protective polymer jacket, usually yellow or black, covers the tubing. It protects from sunlight, rust, and damage.
Fittings and connectors have strong metal-to-metal seals. Some designs make a tight, leak-free connection.
Pipe support systems anchor and hold the lightweight CSST and other gas piping.
Pressure regulators lower gas pressure to safe levels for appliances.
Outdoor vent protectors keep exterior gas line ends safe.
System identification labels and metal tags mark each line and connector for code rules.
Bonding and grounding materials, like UL-rated clamps and #6 gauge wire, guard against electrical dangers.
Safety gear such as gloves and safety glasses protect you during installation.
Always check that every part, from tubing to connector, is certified to ANSI LC1/CSA 6.26 standards. This makes sure your gas system follows safety codes and lasts a long time.
Before you start any installation, you need to check your local building codes and regulations. These rules keep your home safe and help you avoid costly mistakes. Always get the right permits from your local office. Submit your plans for review and schedule inspections during the installation process. Here are the key steps you should follow:
Obtain all required permits from your local building department.
Make sure your installation meets local codes and regulations.
Plan your gas line layout with safety in mind. Avoid high-traffic areas and think about where your appliances will go.
Use reliable tools and secure fittings to prevent leaks.
Provide proper ventilation for gas appliances and install exhaust fans if needed.
Add gas detectors to monitor for leaks.
If you feel unsure, hire a certified professional who knows the codes and permitting process.
Note: Local codes can change, so always double-check before you begin.
You need to plan the route for your csst gas line before you start the installation. Choose a path that is direct and avoids obstacles like walls or attics. Proper pipe sizing is important for safe gas flow. Use 1/2-inch lines for small appliances, 3/4-inch for stoves or furnaces, and 1-inch for higher demand or longer runs. Avoid using 3/8-inch lines as main lines. Secure all fittings and connectors tightly to prevent leaks. Install shutoff valves and carbon monoxide detectors for extra safety. Pressure test the system before use to make sure there are no leaks.
Plan the route to be as short and safe as possible.
Use approved materials like csst tubing or black iron pipe.
Bond the csst to prevent electrical hazards.
Support the line with pipe supports and anchors.
Schedule a final inspection with your local authority before using the system.
Choosing the right fittings and bonding materials is a key part of the installation process. Always use proper fittings that match your csst gas line and connectors. Look for UL listed bonding clamps rated UL 467. Use a minimum 6-AWG copper wire for bonding. Attach the bonding clamp to the nut of the csst or to the black iron pipe downstream of the gas meter. Do not put the clamp directly on the csst tubing. Keep the bonding wire as short as possible to reduce resistance. Follow all manufacturer instructions and local codes for bonding and grounding.
Use only approved connectors and fittings for your csst gas line.
Connect the gas connectors securely to prevent leaks.
Bonding protects your system from electrical surges and reduces the risk of gas leaks.
Bonding requirements have been part of building codes since 2006.
Tip: Always connect the gas connectors with care and check every fitting for a tight seal.
Always turn off the gas before you start working. This keeps you safe and stops leaks while you work. Here is how you do it step by step:
Find the main gas valves. One is outside before the gas meter. The other is inside where the pipe enters your house.
Use an adjustable wrench to turn the outside valve.
Turn the valve so it is across the pipe. This shuts off the gas.
Make sure the gas is off before you start installing a csst gas line.
Tip: Check that no appliances are getting gas before you move on.
Take out any old gas lines before you put in a csst gas line. There are different ways to do this, and each has its own good points:
Method | Description | Advantages and Considerations |
|---|---|---|
Traditional Replacement | Dig around the old gas line to see and remove it before putting in a new one. | You can see the pipe clearly, but digging can mess up your yard and take time to fix. |
Trenchless Replacement | Use small holes to replace the pipe without digging a lot. | This way does not mess up your yard much. It costs less and is faster. |
Pipe Bursting Method | Break the old pipe while pulling a new one through the same spot. | Good for old or broken pipes. It saves money and avoids big holes. Use this when digging is hard. |
Always put a gas-tight cap on any gas outlets you are not using. This stops leaks and keeps your system safe.
Measure the path for your new csst gas line. Use a tape measure to get the right length. Cut the csst with a tubing cutter or rotary pipe cutter. Make sure your cuts are straight and smooth. Do not make sharp bends or kinks in the line. Cut the csst a little longer than you need. This helps you make smooth bends and connect the gas connectors without pulling on the tubing.
Note: Never use a hacksaw or rough tools. These can hurt the csst and cause leaks.
Now put on the fittings and connect the gas connectors to your appliances. Only use approved connectors and fittings for csst. Most csst systems use flare fittings, which do not need sealant. For threaded gas pipe connections, use pipe thread sealant like Teflon tape or pipe dope. These fill gaps and help stop leaks, but do not block electricity. Always do these steps:
Slide the fitting nut and ring onto the csst.
Push the csst into the fitting until it stops.
Tighten the nut with an adjustable wrench.
Connect the gas connectors to each appliance.
Check every connector and fitting to make sure it is tight.
Alert: Do not use sealant on flare fittings or rigid conduit. Only use sealant on threaded connections.
You must hold up the csst tubing at the right spots. This stops it from sagging and keeps it safe from damage. How often you support the line depends on its size. Use this chart to help you:
Tubing Size (inch O.D.) | Support Interval (feet) Horizontal | Support Interval Vertical |
|---|---|---|
1/2 | 4 | Every floor level |
5/8 or 3/4 | 6 | Every floor level |
7/8 or 1 | 8 | Every floor level |
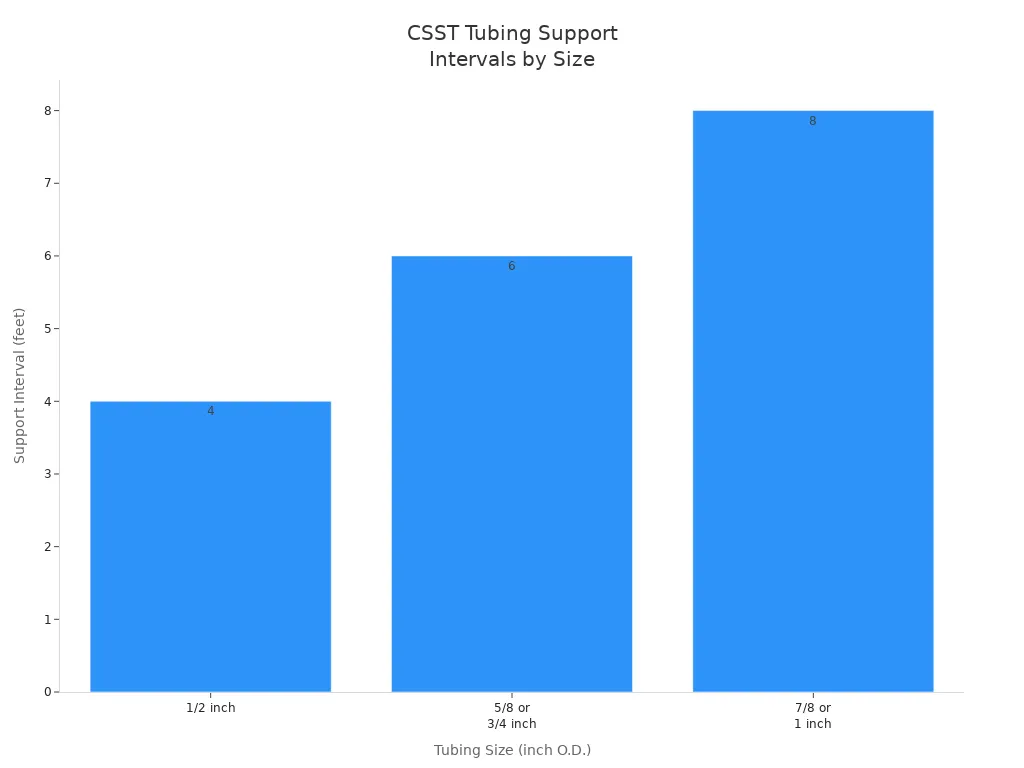
Use pipe supports or anchors to hold the line. Put supports every 4 to 8 feet, depending on the tubing size. Always support the line at each floor for vertical runs. Do not make sharp bends and keep the line away from heat.
Bonding and grounding protect your csst gas line from electrical surges and lower fire risk. You must bond the csst based on the jacket type:
Aspect | Yellow CSST (Non-Arc-Resistant) | Black CSST (Arc-Resistant) |
|---|---|---|
Jacket Type | Yellow, not arc-resistant | Black, arc-resistant with thick or layered black jacket |
Bonding Requirement | Must bond to the home's grounding system using at least 6-AWG copper wire | Usually no extra bonding needed unless the jacket is stripped more than 2 inches from the fitting |
Purpose of Bonding | Stops voltage buildup and prevents sparks from lightning | The jacket spreads out arcing energy and stops holes in the tubing |
Bonding Location | After the gas meter or propane regulator, on black iron pipe or fitting nut, not on csst tubing | Same as yellow csst if bonding is needed |
Special Conditions | Bonding needed by IFGC Section 310.1/IRC Section G2411.1 | If jacket is stripped more than 2 inches, bond like yellow csst and wrap exposed tubing with self-bonding silicone tape |
Grounding Electrode System | Use the main grounding system; do not make a separate one for gas piping | Same as yellow csst |
Code References | IFGC, IRC, CSA/ANSI LC-1, ICC Evaluation Service | Same codes; bonding exceptions if arc-resistant jacket is certified and local code allows |
Safety Note | Bonding lowers risk from lightning but does not stop direct strikes | Same note applies |
To bond the csst, do these steps:
Use a bonding jumper that matches your electrical service.
Connect the jumper to the grounding system with a UL 467 listed clamp.
Put the clamp on the gas piping after the meter or regulator, never on the csst tubing.
Keep the bonding wire short and support it by itself.
Make sure you can reach the bonding connection and it is not hidden.
Tip: Bond the csst even if you use black arc-resistant csst, especially if the jacket is stripped more than 2 inches from the fitting.
After you finish, you must check for gas leaks. Leak testing is very important for safety. Follow these steps:
Take off all shutoff valves and cap the pipes before you test.
Put a pressure test gauge on the gas piping.
Pump up the system to 12-14 inches of water column for a low-pressure test. Watch for any drop in pressure.
For a pre-test, use higher pressure (up to 30 psi) to find weak spots or leaks in new fittings.
Let out the test pressure after testing.
Put the shutoff valves and appliance connections back on.
Use soapy water or leak detection liquid on all connectors and fittings. Look for bubbles that show leaks.
Watch the system pressure for a few hours to make sure it does not drop.
Alert: Never test with shutoff valves attached at high pressure. This can break the valves.
If you want to put a csst gas line underground or outside, follow these rules:
Put csst inside a non-metallic, watertight pipe below ground.
Make the pipe stick out at least 2 inches past where the line comes inside the building.
Make the pipe stick out at least 4 inches outside the building and vent it above ground to stop water and bugs from getting in.
Seal the ends of the pipe to stop gas leaks.
Use csst that resists rust or is factory-coated for underground use.
Bury the line at least 12 inches deep, or 8 inches for single outdoor appliance lines.
Put a tracer wire next to underground plastic piping so you can find it later.
Seal all spaces around pipes and sleeves with approved materials.
Note: Never let gas piping go through the building foundation below ground. Always follow local codes for outdoor and underground installation.
You need to be careful when working with a csst flexible gas line. Many people make mistakes that can put everyone in danger. Here are some common things to watch out for:
If you use the wrong size line, it can leak or not work well.
Not following local rules can cause leaks, explosions, or legal trouble.
Using bad or unapproved materials can make leaks and rust more likely.
If there is not enough air or space, it can cause breathing problems or explosions.
Bad connections or wrong fittings can let gas escape.
If you skip leak tests, you might not find hidden leaks.
Not hiring a pro or licensed electrician for bonding can cause electrical dangers.
If you forget permits or inspections, your insurance might not help later.
Tip: Always use approved materials and follow all safety rules. Bonding and grounding help protect your csst flexible gas line from fire and electrical surges.
If you do not bond right or use bad materials, it can cause electrical sparks. This can melt the csst and cause leaks, fires, or explosions. You must follow all safety steps and code rules to keep your home safe.
Some jobs need a pro to keep you and your family safe. Call a licensed electrician or gas expert if these things happen:
You smell gas like rotten eggs in your house.
You want to put in, fix, or move a csst flexible gas line.
You need to add new gas appliances or change your gas system.
You see rust, damage, or corrosion on your csst or gas line.
Your gas appliances do not work right or have low pressure.
You need to follow local rules, get permits, or pass inspections.
Local rules often say you need a pro for csst installation and bonding. Some places only let a licensed electrician do bonding for csst safety.
A pro uses special tools and follows strict safety steps. This helps stop leaks, fires, and other dangers. Never try to fix or install a csst flexible gas line by yourself if you are not sure. Your safety and your home’s safety are most important.
You must follow strict steps when installing a csst gas line. Always shut off the main gas valve, use the right fittings, and check for leaks at every connection. Bonding the csst to your home's electrical ground protects against lightning and meets code. Local code officials and manufacturer guides help you stay compliant. If you feel unsure, contact a professional for help.
Stay safe—reach out to our team for more information or to discuss your gas line needs.
Bonding protects your home from electrical surges. You connect the gas line to your electrical ground. This step helps prevent fires or damage if lightning strikes nearby.
Yes, you can install CSST outdoors or underground. You must use a watertight sleeve for underground runs. Always seal the ends and follow local codes for depth and protection.
You use soapy water or a leak detection solution. Brush it on every fitting and connection. If you see bubbles, you have a leak. Fix leaks before using the gas line.
Most places require a permit for gas line work. You should check with your local building department before starting. Permits help keep your installation safe and up to code.
Leave your home right away. Do not use lights or electronics. Call your gas company or emergency services from outside. Safety comes first when you smell gas.


