


Views: 0 Author: Site Editor Publish Time: 2025-08-07 Origin: Site


I’ve seen so many people run into problems with their monitor mount installation. It’s way more common than you might think. In fact, studies show that over half of us end up with monitors set at the wrong height or angle, which leads to annoying visual symptoms and even headaches. Some of the most frequent installation pitfalls I notice include:
Struggling with VESA compatibility
Over-tightening the mount or clamps
Mounting to weak surfaces and facing stability issues
Ignoring ergonomic basics in desk setup
Letting cable management turn into a tangled mess
These problems don’t just make your desk setup look messy—they can actually affect your comfort and productivity. I’ll walk you through practical solutions that make installation simple and safe.
Always check your monitor’s VESA compatibility before buying a mount to ensure a safe and stable fit.
Avoid over-tightening clamps to prevent damage to your desk and monitor arm; tighten just enough for stability.
Mount your monitor arm only on strong surfaces like wood studs or solid desks to keep it secure and safe.
Set your monitor height so your eyes look slightly downward at the screen to reduce neck and eye strain.
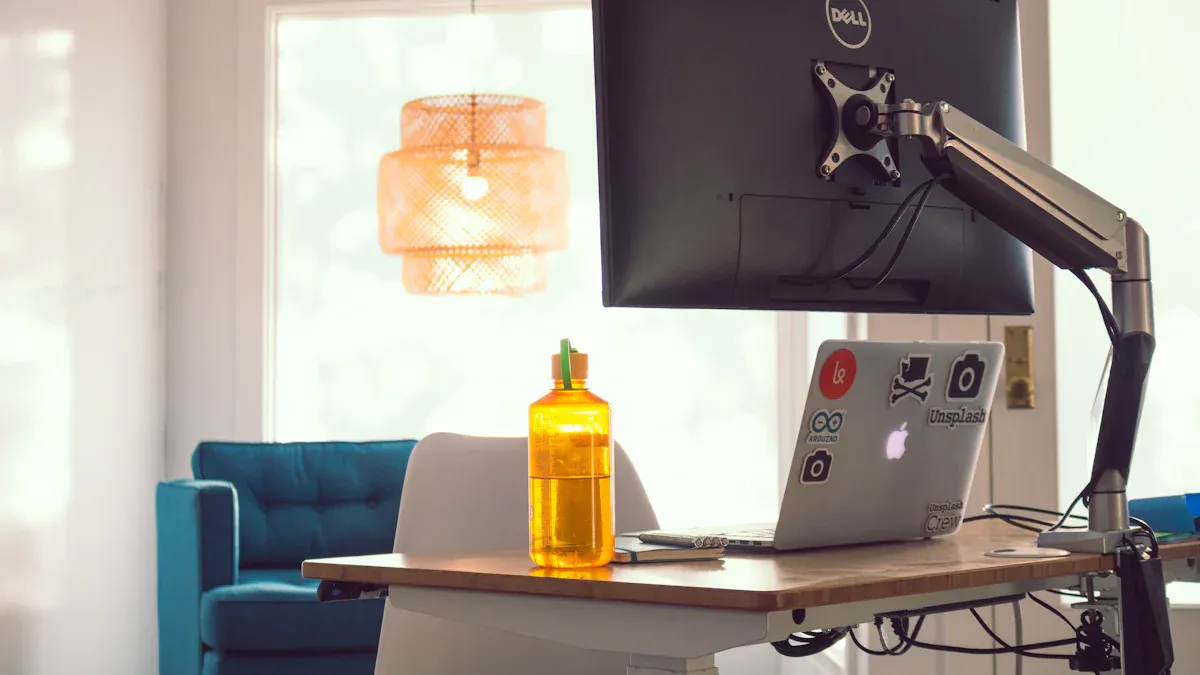
Plan and organize your cables during installation to keep your workspace neat, safe, and efficient.
Before I even think about attaching a monitor mount, I always check if my monitors require vesa mount compatibility. This step saves me from a lot of frustration later. The vesa standard, also called the Flat Display Mounting Interface Standard, is the industry rule for how monitors and mounts fit together. Most companies follow this vesa standard, so it helps make sure that a monitor mount will work with many different monitors.
The vesa standard uses a set pattern of holes on the back of the monitor. These holes are usually arranged in a square or rectangle. The most common vesa standard patterns are 75x75 mm and 100x100 mm. Bigger monitors might use 100x200 mm or even 200x200 mm. If I skip this step, I risk buying a mount that just won’t fit. I always look for these patterns in the monitor’s manual or on the back of the monitor itself.
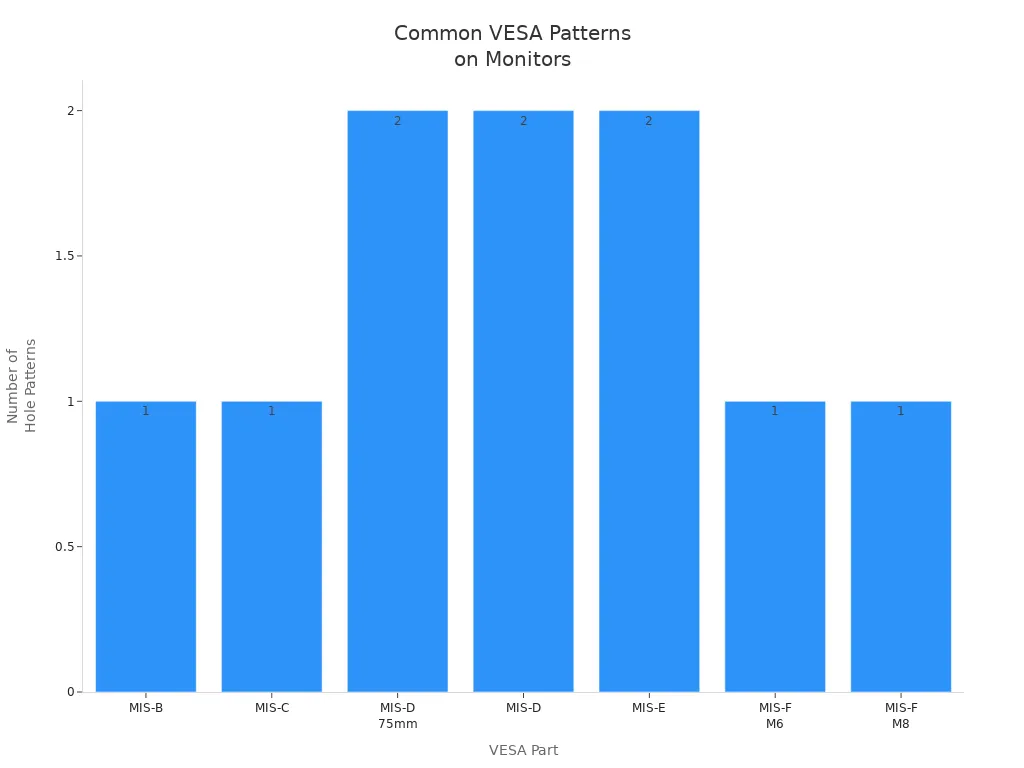
Here’s a quick table I use to check the most common vesa standard patterns:
VESA Part | Screen Size (min) | Max Weight | Hole Patterns (mm) | Screw Size |
|---|---|---|---|---|
MIS-D 75mm | 12 in | 8 kg | 75x75, 50x75 | M4 |
MIS-D | 12 in | 14 kg | 100x100, 50x100 | M4 |
MIS-E | 23 in | 22.7 kg | 100x200, 50x200 | M4 |
MIS-F M6/M8 | 31 in | 50-113.6kg | 200x200+ | M6/M8 |
Tip: Sometimes, the vesa standard holes hide under a plastic cover or the stand. I always check carefully before I decide a monitor is not compatible.
Once I know my monitors require vesa mount compatibility, I double-check the hole pattern and the weight. If the vesa standard pattern on my monitor does not match the mount, the installation will not be safe. The monitor might not attach properly, and that can lead to wobbly screens or even damage.
I also pay attention to the screw size. Most monitors use M4 screws, but larger screens might need M6 or M8. If my monitor is not vesa standard compatible, I look for adapters. Some brands, like Apple, almost always need a special adapter or custom mount.
Here’s what I do before I start installation:
Check the back of the monitor for a vesa standard hole pattern.
Measure the distance between the holes (like 75x75 mm or 100x100 mm).
Make sure the monitor’s weight fits within the mount’s limit.
Look for hidden holes under covers or stands.
If needed, buy an adapter for non-standard monitors.
By following these steps, I make sure my monitor mount installation is safe, stable, and hassle-free.
When I first started setting up my monitor arm desk mount, I thought tightening the clamp as much as possible would keep my monitor safe. I quickly learned that using too much force can actually cause more problems than it solves. Over-tightening the clamp can damage your desk, especially if you have a glass or thin tabletop. I’ve seen people crack their desks or leave deep marks because they wanted their monitor arm to feel extra secure.
Instead, I always tighten the clamp just enough to hold the monitor arm desk mount steady. I check for any wobbling by gently moving the monitor. If it feels stable, I stop tightening. This simple step helps with preventing sagging arms and avoids unnecessary damage. I also make sure to follow the instructions that come with my monitor arm. Each type of monitor arm might have different requirements, so I never skip the manual.
Some common problems with monitor arms start with over-tightening. You might notice stability issues or even see the mount start to bend. If you use a dual monitor arm or a customizable monitor arm, the risk of damage increases because of the extra weight. I always remind myself that a secure fit does not mean the tightest fit.
For anyone using a monitor arm desk mount on a fragile surface, I highly recommend reinforcement plates. These plates make a huge difference in my monitor arm setup. Here’s what I’ve noticed:
Reinforcement plates spread the pressure from the monitor arm clamp over a larger area. This helps prevent cracks and scratches on glass or thin desks.
The plate adds stability by making the desk feel heavier and sturdier. My dual monitor arm feels much more secure with this extra support.
Anti-slip pads on the plate protect the desk from scratches.
Most plates are made from strong steel and work with many types of monitor arms, including monitor arm desk mounts.
The plate sits between the clamp and the desk, which distributes the weight and keeps the desktop safe.
If I position my monitor directly above the clamp, I reduce torque stress and help with preventing sagging arms.
Using reinforcement plates has solved a lot of problems for me. I always choose a high-quality plate and a compatible monitor arm for the best results in my installation.
When I plan my monitor arm desk mount installation, I always check the wall first. I never trust drywall alone to hold up my monitor arm or monitor. Drywall just can’t handle the weight, and I’ve seen too many setups fail because of this. For a safe and sturdy desk setup, I look for solid wood studs or a concrete wall. I use a stud finder to find the center of at least one stud—two is even better. This gives my monitor arm desk mount the grip it needs.
Here’s what I do every time:
I use heavy-duty lag bolts for wood studs. These bolts keep the monitor arm desk mount secure.
For concrete or brick, I grab special anchors and a hammer drill. Regular screws won’t work here.
If I have plaster walls, I drill pilot holes first. This stops the wall from cracking.
I always use the hardware that comes with the mount. It’s made for the weight and space requirement of my monitor and monitor arm.
I avoid drywall anchors. They just don’t last and can lead to stability issues.
Tip: Always double-check VESA compatibility. This spreads out the weight and keeps the mounting points strong.
I’ve learned that following these steps prevents problems and keeps my monitor arm desk mount safe for daily use.
When I use a monitor arm desk mount on my desk setup, I pay close attention to the desk’s thickness. Most desk mount options need a minimum thickness of 0.5 inches. If my desk is thinner, it might not support the monitor arm or the monitor. I measure the edge before I start the installation. This simple check saves me from future problems and keeps my workspace safe.
I also think about the space requirement for my monitor arm desk mount. Some desk mount options need extra room under the desk or behind it. I make sure nothing blocks the clamp or the arm’s movement. This helps me avoid stability issues and gives me the flexibility I want in my desk setup.
Note: Always check the space requirement for your monitor arm desk mount before you buy. Not all desks work with every mount.
By checking both the wall and desk strength, I make sure my monitor arm desk mount stays secure and my desk setup works for me. I avoid common problems and enjoy a safer, more organized workspace.
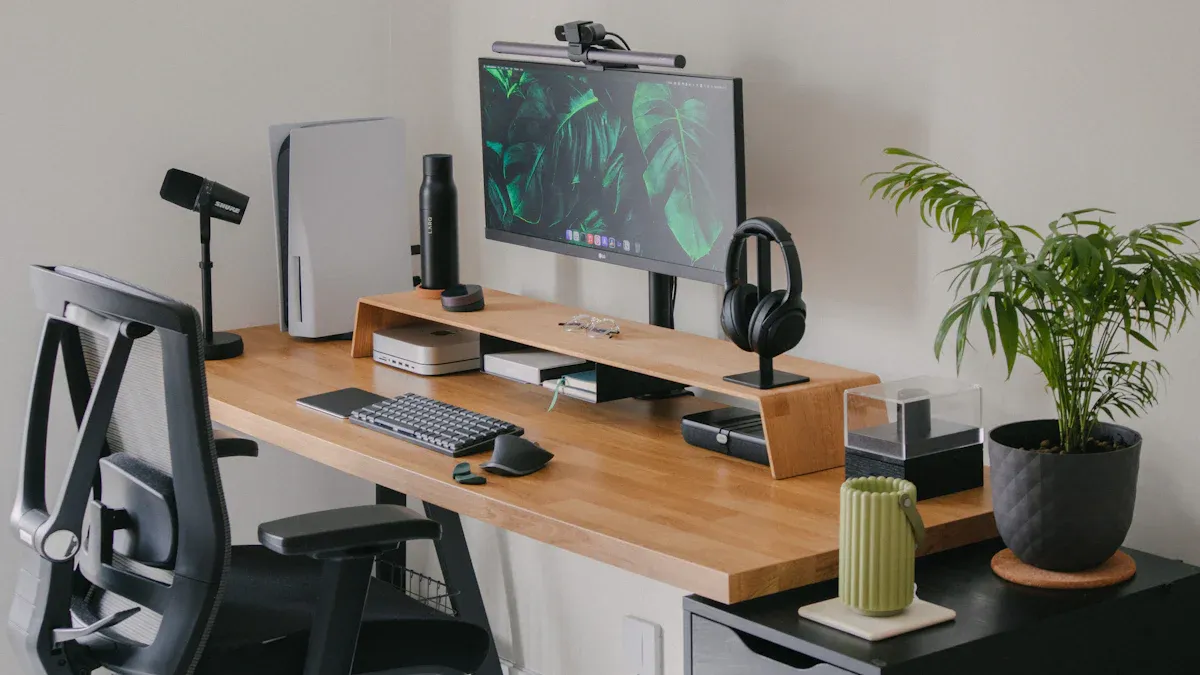
When I set up my monitor, I always pay close attention to the height. Getting this right makes a huge difference in how my neck and eyes feel after a long day. According to ergonomics experts, the best position is to have my eyes looking slightly downward at the screen. I learned that the top of the monitor should sit at or just below my eye level. This way, my eyes naturally fall about 2 to 3 inches below the top edge. I try to keep my neck straight and my shoulders relaxed. If I use a height adjustable stand or an adjustable monitor mount, I can easily change the height until it feels just right.
I used to think the monitor should be at head height, but now I know that looking downward between 20 and 50 degrees is better. This position helps my eyes stay comfortable and reduces neck strain. If I notice any pain or discomfort, I adjust the screen position until I find a neutral, ergonomic posture. Studies show that even small changes in monitor height can lower neck and upper back pain, which helps me stay focused and productive.
Tip: A height adjustable stand or monitor arm with a wide adjustment range lets me fine-tune the setup for my comfort.
After I set the height, I check how far the monitor sits from my eyes. I aim for a distance of about 20 to 30 inches, which is roughly an arm’s length. This distance keeps text clear and helps my eyes relax. If the monitor is too close, I get tired faster. Too far, and I start leaning forward, which ruins my posture.
With an adjustable monitor mount, I can move the screen forward or back as needed. The adjustment range on these mounts makes it easy to find the perfect spot. I always make sure the monitor sits straight in front of me, not off to the side. This setup supports good ergonomics and keeps my workspace comfortable.
Remember: The right adjustment range for both height and distance helps prevent eye strain and keeps me working at my best.
When I start a new monitor setup, I always think about cable management before I even plug anything in. Planning cable routing saves me a lot of headaches later. I look at where my power outlets and devices sit, then decide the best path for each cable. I try to keep power and signal cables separate to avoid interference. If I mix them up, I notice more problems with my monitor and other devices.
I use these tools to help with cable management:
Cable trays and clips keep wires tucked under my desk.
Velcro ties or zip ties bundle cables together and stop them from hanging down.
Cable sleeves group cables running in the same direction, making everything look neat.
Power strips mounted under the desk keep plugs off the floor and easy to reach.
Labels or colored ties help me tell cables apart when I need to unplug something.
Tip: I always label my cables during installation. It makes future changes much easier.
Cable clutter sneaks up fast, especially when I connect a monitor, keyboard, headset, router, and other gadgets. I used to let cables pile up behind my desk, but that caused all sorts of trouble. Tangled wires made it hard to clean, and I worried about tripping or damaging something.
Here’s what I learned about the risks of poor cable management:
Disorganized cables get damaged more easily and can cause electrical failures.
Exposed wires face heat, dust, and moisture, which shortens their life.
Messy cables increase the risk of tripping, shocks, and even fires.
Equipment doesn’t last as long when cables aren’t protected.
To keep my workspace safe and tidy, I:
Separate power and data cables to cut down on interference.
Use cable trays to protect and organize wires.
Secure loose cables to desk legs or along walls with clips or Velcro straps.
Hide bulky plugs and power strips out of sight.
Good cable management not only keeps my desk looking sharp, but it also protects my equipment and makes my monitor installation last longer. I find that a little planning goes a long way toward a safer, more organized workspace.
I’ve learned that avoiding common mistakes—like skipping VESA checks, over-tightening, using weak surfaces, ignoring ergonomics, or letting cables pile up—makes a huge difference. The right solutions help me keep my workspace safe and comfortable. Studies show that following these steps can prevent injuries and boost productivity. I always double-check each part of the process, from choosing the right mount to planning cable routes. Careful setup means fewer problems and a smoother workday.
I always check the back of my monitor for four screw holes in a square or rectangle pattern. If I see them, it’s VESA compatible. I also look in the manual or search the model online for “VESA mount.”
I never mount directly on glass. It’s risky and can crack. If I must use a glass desk, I add a steel reinforcement plate and double-check the weight limit. I prefer a solid wood or metal desk for safety.
I measure the distance before mounting. If my cables come up short, I buy longer ones or use extension cables. I always plan my cable routing first to avoid surprises.
Tip: Cable sleeves or trays help keep everything tidy and out of sight.
I tighten the clamp until the arm feels stable and doesn’t wobble. I stop before I feel strong resistance. Over-tightening can damage the desk or clamp. I always follow the instructions from the manufacturer.


