


Views: 0 Author: Site Editor Publish Time: 2025-08-10 Origin: Site


When I picked my first monitor mount, I quickly realized it all came down to a few key things: my monitor’s size, its weight, VESA compatibility, my desk type, and how I wanted to sit each day. Using a monitor mount made my workspace feel organized and comfortable. My back and neck thanked me for the better posture. If you think about your daily habits and how your desk looks right now, you’ll find the right fit too.
Choose a monitor mount that fits your monitor’s size, weight, and VESA pattern to keep it safe and steady.
Pick a mount type that matches your desk style and workspace needs, like clamp, grommet, freestanding, or wall mounts.
Use adjustable mounts to set your screen height, tilt, swivel, and rotation for better posture and less eye strain.
Look for mounts made of strong materials with built-in cable management to keep your desk tidy and stable.
Plan your setup carefully by measuring your desk and monitor, checking weight limits, and reading instructions before installing.
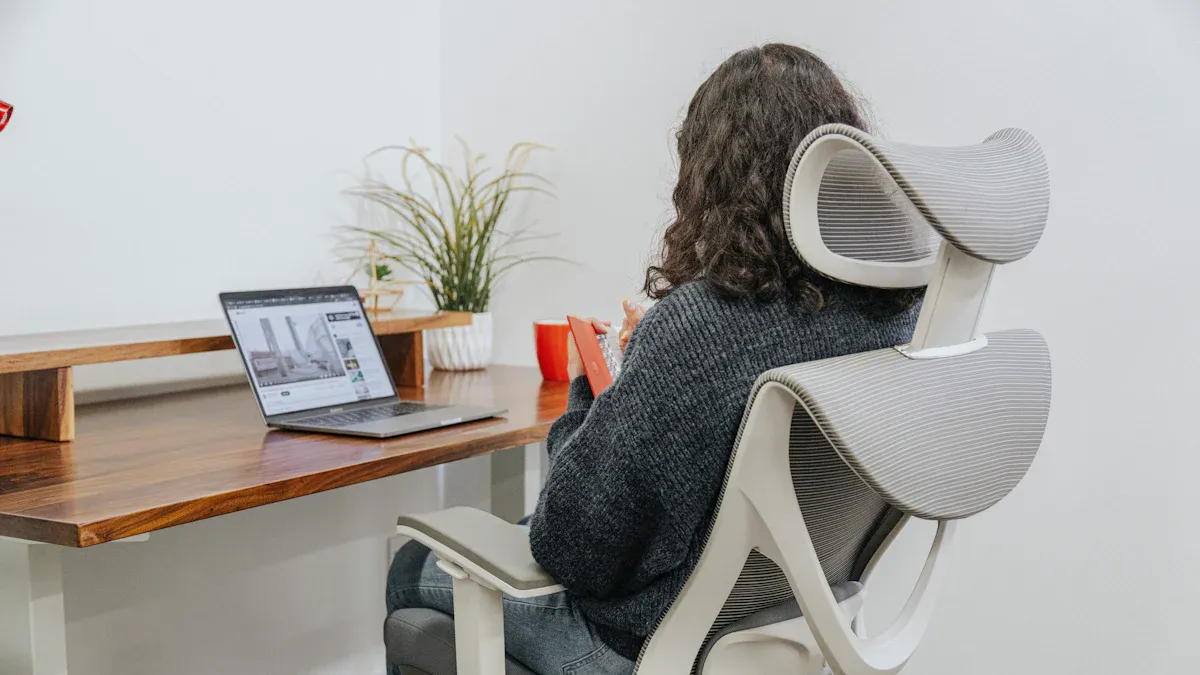
When I switched to a monitor mount, I noticed a big difference in how my body felt at the end of the day. I could adjust the height, depth, and angle of my screen until it felt just right. My neck and back stopped aching because I no longer had to hunch over or twist awkwardly. Studies show that more than half of people who use monitor arms experience less neck flexion, and over 40% feel less tension in their torso. The CDC even points out that poor ergonomics can lead to musculoskeletal problems, so getting my monitor at the right height really matters. I like that I can move my screen around easily, whether I’m sitting, standing, or sharing my screen with someone else. It’s all about finding that comfortable spot that keeps me working longer without pain.
My desk used to feel crowded, with cables everywhere and barely enough room for my coffee mug. Once I installed a monitor mount, I freed up a lot of space. Lifting the monitor off the desk made everything look neater. I could finally spread out my notes and keep my essentials close by. Built-in cable management helped keep wires out of sight, which made my workspace look clean and professional. According to recent surveys, people who use monitor arms say their desks feel more organized and less cluttered. This tidy setup helps me focus better and reduces stress during busy days.
Tip: A clutter-free desk can boost your concentration and make your workspace feel more inviting.
I get more done with a monitor mount, especially when I use two screens. Studies show that dual monitors can boost productivity by up to 25%. Tasks that used to take me four hours now only take three. I spend less time switching between windows and more time actually working. My posture stays comfortable, so I don’t get distracted by aches and pains. Many companies now use multiple displays to help employees work faster and feel better at their desks. I’ve found that a good monitor mount makes multitasking easier and keeps me on track all day.
When I started looking for a monitor mount, I realized that not every mount fits every screen. The size and weight of your monitor matter a lot. If you pick a mount that cannot handle your monitor’s weight, you risk damaging both the mount and your screen. I always check the manufacturer’s specs before buying. Most mounts list the maximum weight and size they can support.
Here’s a quick table I use to match my monitor with the right mount:
VESA Standard | Monitor Size Range (inches) | Weight Limit (lbs) | Common VESA Hole Patterns (mm) |
|---|---|---|---|
MIS-D | 12 to 22.9 | Up to 30.8 | 75 x 75, 100 x 100 |
MIS-E | 23 to 30.9 | Up to 50-66 | 100 x 200, 200 x 100 |
MIS-F | 31 to 90 | Up to 110-250 | 200 x 200, 200 x 400, 400 x 600 |
I find this table helpful because it shows the range for each VESA standard. For example, if my monitor is 27 inches and weighs 18 lbs, I look for a mount that supports MIS-E. If I have a bigger display, like a 40-inch screen, I need a mount that matches MIS-F.
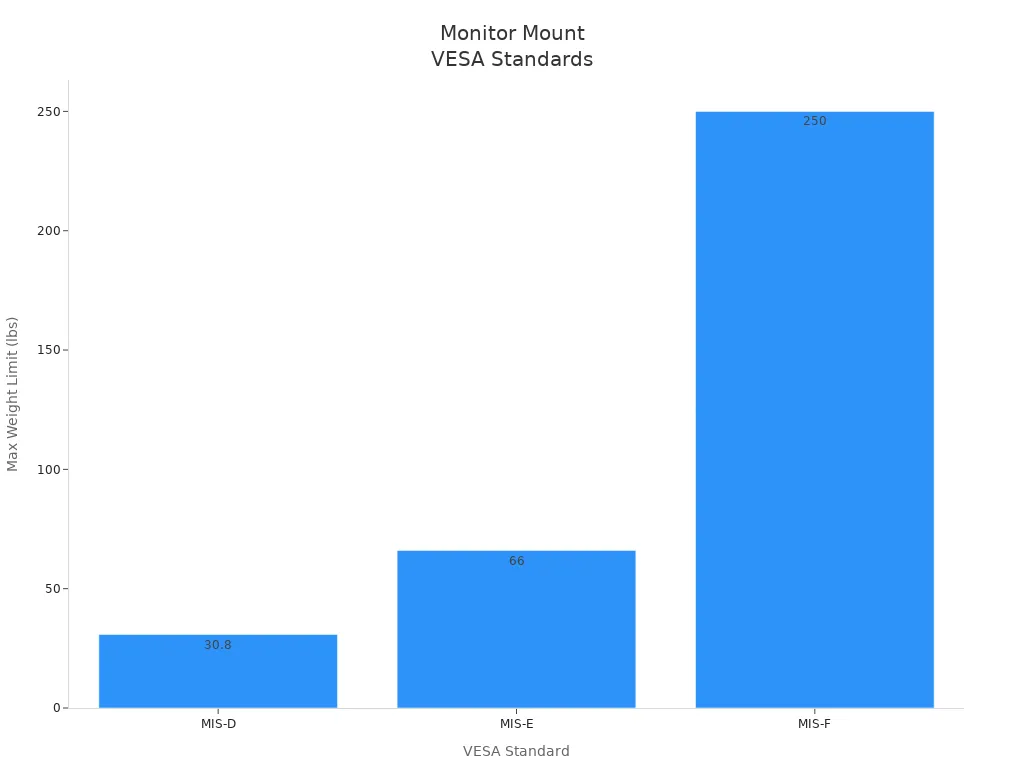
This chart gives a clear picture of how much weight each standard can handle. I always double-check these numbers before I buy anything. Picking the right mount keeps my monitor safe and steady.
Tip: Always check both the size and weight of your monitor before choosing a mount. A mount that fits your screen size but not the weight can still cause problems.
When I first heard about VESA, I wondered what it meant. VESA stands for Video Electronics Standards Association. They set the rules for how monitors attach to mounts. Most modern monitors follow these standards, which makes shopping much easier.
VESA 100 is the most common for monitors between 24 and 32 inches. It supports up to 20 kg, which covers most home and office screens.
Bigger monitors use VESA 200, 400, or even 600. These standards handle heavier and larger displays.
I like that most monitors today support VESA standards. This gives me lots of options for mounting and adjusting my screen.
If your monitor does not have VESA holes, you can buy a VESA adapter. I used one for an older screen, and it worked well.
The VESA standard makes it easy to find a compatible monitor mount. I just check the back of my monitor for the hole pattern and match it to the mount’s specs. Most mounts list the supported VESA patterns right on the box or in the product description.
I find that sticking with VESA-compliant mounts gives me peace of mind. I know my monitor will fit securely, and I can adjust it for the best viewing angle. The wide adoption of VESA standards means I can upgrade my monitor later without worrying about compatibility.
Note: If you plan to upgrade your monitor in the future, choose a mount that supports a range of VESA patterns. This way, you won’t need to buy a new mount every time you get a new screen.
When I started shopping for a monitor mount, I realized not every desk works with every mount. I had to look at my desk and figure out what would fit best. Most desks handle three main types of monitor mounts:
Free Standing Mounts: These sit right on top of the desk. I like them because I don’t need to clamp or drill anything. The weighted base keeps the monitor steady. This type works well if you move your setup often or have a glass desk.
Desk Clamp Mounts (C-clamp): These attach to the back edge of the desk. I had to measure my desk’s edge thickness to make sure the clamp would fit. If the edge is too thick or too thin, the clamp might not hold securely.
Grommet Mounts: These use a hole in the desk, called a grommet hole. My desk didn’t have one, but some people drill a hole for this purpose. Grommet mounts work great if your desk edge is too shallow for a clamp.
I always check if my monitor is VESA compliant and within the weight limit for the mount. The VESA mounting standard tells me if the screw holes on my monitor will line up with the mount. Most monitors under 30 lbs use the MIS-D standard, which fits most desk mounts. If I skip this step, I risk a wobbly or unsafe setup.
Tip: Measure your desk edge and check for grommet holes before you buy a mount. This saves time and avoids returns.
My old monitor stand took up a lot of space. I barely had room for my notebook or coffee mug. When I switched to a monitor mount, I noticed a big difference. Lifting the monitor off the desk freed up valuable workspace. I could finally spread out my papers and keep my desk tidy.
Monitor mounts help me organize my cables, too. With the monitor floating above the desk, I can tuck wires out of sight. This makes my workspace look cleaner and helps me focus.
If you have a small desk or work in a tight spot, a monitor mount can make your area feel bigger. I find it much easier to keep things organized and clutter-free. A tidy desk helps me stay productive and relaxed throughout the day.
Note: Monitor mounts create more usable desk space than standard monitor stands. This is especially helpful in compact home offices or shared workspaces.
Choosing the right monitor mount can feel overwhelming at first. I remember looking at all the options and wondering which one would actually fit my desk and make my workspace better. Let me break down the main types I’ve tried and seen in action, so you can pick the one that matches your needs.
Clamp mounts, sometimes called C-clamps, attach right to the edge of your desk. I like these because I don’t have to drill any holes or make permanent changes to my furniture. I just slide the clamp onto the desk edge and tighten it. This style works well for most desks, especially if the edge is thick enough and there’s a bit of overhang.
Here’s a quick look at the pros and cons:
Aspect | Advantages | Disadvantages |
|---|---|---|
Stability | Holds the monitor steady, even if I bump the desk | Needs a sturdy desk edge |
Installation | No drilling or permanent changes needed | Can’t use on desks with thick or curved edges |
Flexibility | Easy to move or remove if I change my setup | Takes up some space at the back edge |
Maintenance | Simple to tighten if it loosens over time | Screws may need occasional checking |
I find clamp mounts especially handy if I want to rearrange my workspace or move to a new desk. Recent market data shows that desk mounts, including clamp styles, are the most popular choice for home offices. They offer great flexibility and help keep my desk clear.
Tip: Always measure your desk edge before buying a clamp mount. Some clamps only fit certain thicknesses.
Grommet mounts use a hole in the desk—either one that’s already there or one I drill myself. The mount’s base fits through the hole, and I secure it underneath with a plate and screw. This setup feels more permanent than a clamp, but it gives a really clean look.
Here’s how grommet and clamp mounts compare:
Mount Type | Installation Requirements | Suitable Desk Types | Installation Characteristics | Permanence & Flexibility |
|---|---|---|---|---|
Grommet Mount | Needs a pre-existing or drilled hole in the desk | Desks with grommet holes | Sits flush, looks neat, very secure | More permanent, less flexible |
Clamp Mount | Attaches to desk edge, no holes needed | Most desks with a flat edge | Easy to install and remove | More flexible, less permanent |
I recommend grommet mounts if you want a stable, tidy setup and don’t mind making a small change to your desk. They’re perfect for desks with built-in cable holes or if you want your monitor mount to stay put for the long haul.
Note: If your desk is glass or you rent your space, a grommet mount might not be the best choice.
Wall mounts take things off the desk completely. I’ve used these when I needed every inch of desk space or wanted a super clean look. Wall-mounted monitor arms attach directly to the wall, so I can adjust the height, tilt, and even rotate the screen. This type works great in small rooms, shared offices, or places where I want to keep my monitor safe from bumps.
Some of the best uses for wall mounts include:
Freeing up desk space in tight home offices or studios
Setting up multi-monitor displays for gaming or productivity
Securing monitors in public or commercial spaces to prevent theft
Creating ergonomic setups with full motion, tilt, and rotation
Mounting screens in technical environments, like server rooms
I always check that my wall can support the weight and that my monitor is VESA compatible before installing. Wall mounts often come with cable management features, which help keep everything tidy.
Tip: Use a stud finder before installing a wall mount. Drywall alone won’t hold a heavy monitor safely.
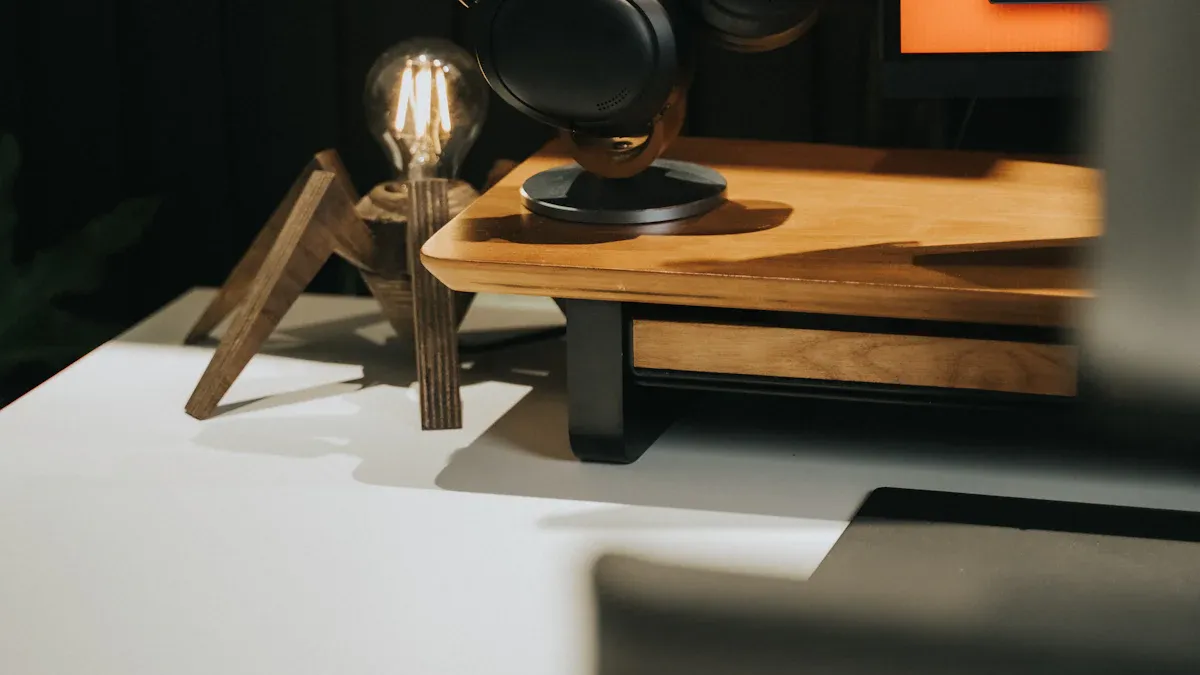
Freestanding mounts are the simplest option. I just place the weighted base on my desk, attach the monitor, and I’m done. No clamps, no holes, no tools. This style is perfect if I move my setup often or have a glass desk that can’t handle clamps or drilling.
Here’s why I sometimes choose a freestanding mount:
No installation required—just set it on the desk
Works on any surface, including glass or thick desks
Easy to move or reposition whenever I want
Great for temporary setups or shared workspaces
The downside? Freestanding mounts take up a bit more desk space than clamp or grommet mounts. The base needs to be heavy enough to keep the monitor stable, so it can feel bulky on a small desk.
Note: If you want maximum flexibility and zero commitment, a freestanding mount is a solid choice.
When I pick a monitor mount, I always start by looking at my desk. If I want something easy to install and move, I go with a clamp mount. For a cleaner, more permanent look, I choose a grommet mount. If I need to save every inch of desk space, a wall mount works best. For total flexibility or a glass desk, I stick with a freestanding mount.
I also think about how often I’ll move my setup and whether I want to drill holes or make permanent changes. Each type has its own strengths, so I match the mount to my workspace and daily habits.
When I set up my workspace, I always look for a monitor mount that lets me adjust the height. I want my eyes to line up with the top of the screen. This helps me avoid neck pain and keeps my posture straight. Some mounts use a gas spring arm, which makes it easy to move the monitor up or down with just a light touch. Others use a fixed pole, so I have to loosen a knob and slide the monitor to the right spot. I like the gas spring style because I can change the height quickly if I switch from sitting to standing.
Tip: Place your monitor so the top edge is at or just below eye level. This simple trick can make a big difference in comfort.
I often adjust the tilt and swivel on my monitor mount to cut down on glare from windows or lights. Tilt lets me angle the screen up or down. Swivel lets me turn the monitor left or right. These features help me share my screen with others or just find the best view for myself. I notice less eye strain when I can fine-tune the angle. Some mounts offer a wide range of motion, while others feel more limited. I always check the specs before I buy.
Here’s a quick table I use to compare adjustability:
Feature | Why I Use It | Typical Range |
|---|---|---|
Tilt | Reduce glare, comfort | -45° to +45° |
Swivel | Share screen, adjust view | Up to 180° |
Sometimes I need to rotate my monitor from landscape to portrait mode. This is great for reading long documents or coding. A good monitor mount lets me spin the screen 90 degrees with little effort. I find this feature handy when I work on different types of projects. Not every mount supports rotation, so I always check for this if I know I’ll need it.
Note: If you use your monitor for both work and creative tasks, rotation can help you get more out of your setup.
When I shop for a monitor mount, I always check what it’s made of. The material tells me a lot about how long the mount will last and how steady it will feel on my desk. Most of the mounts I’ve tried use steel, aluminum, or a mix of both. Steel feels heavy and strong. It keeps my monitor from wobbling, even if I bump the desk. Aluminum weighs less, but it still feels sturdy and looks sleek. Sometimes, I see plastic parts on cheaper mounts. These can work for light monitors, but I don’t trust them for bigger screens.
Here’s a quick table I use to compare materials:
Material | Strength | Weight | Look | Best For |
|---|---|---|---|---|
Steel | Very strong | Heavy | Matte/Glossy | Heavy or large monitors |
Aluminum | Strong | Lightweight | Sleek/Modern | Everyday use |
Plastic | Less strong | Very light | Varies | Small, light monitors |
I always pick a mount that feels solid when I hold it. If it creaks or bends, I put it back. A good mount should give me peace of mind every time I adjust my screen.
Messy cables drive me crazy. When I first set up my monitor mount, I had wires everywhere. Now, I look for mounts with built-in cable management. These mounts have clips or channels that hide the cables along the arm. My desk looks much cleaner, and I don’t trip over cords.
Here’s how I keep my cables neat:
I run the power and video cables through the mount’s cable guides.
I use small Velcro straps to bundle extra cable length.
I label each cable, so I know which one goes where.
Tip: Tidy cables not only look better, but they also make it easier to move or swap out your monitor later.
A clean setup helps me focus. I spend less time untangling wires and more time getting work done. If you want a workspace that feels organized, don’t skip the cable management features on your next monitor mount.
One feature I always look for in a monitor mount is built-in USB ports. These ports make my life so much easier. I can plug in my phone, keyboard, or even a flash drive right at my desk. I don’t have to reach behind my computer or crawl under the desk to find an open port. Many of the latest monitor mounts include USB ports as a standard feature. I see this more and more when I shop for mounts online or in stores.
Having USB ports on my monitor mount keeps my workspace tidy. I can charge my devices or connect accessories without adding extra clutter. Some mounts even offer multiple USB ports, so I can plug in everything I need at once. This small detail saves me time and keeps my desk organized.
Tip: If you use a lot of gadgets, look for a mount with at least two USB ports. It makes a big difference in daily use.
Accessory support is another thing I pay close attention to. I want my monitor mount to adapt as my needs change. Many users, including myself, want mounts that offer modularity and flexibility. I like mounts that let me add or swap out parts, such as extra arms for a second monitor or trays for my keyboard and mouse.
Here are some accessory options I find useful:
Extra arms for dual or triple monitor setups
Printer trays or shelves for small devices
Adjustable pole heights for different desk setups
Interchangeable mounting bases for different surfaces
Modular mounting systems, like the ones from Atdec, give me endless ways to customize my workspace. I can adjust the height and angle easily, which helps with ergonomics and productivity. I also appreciate mounts that let me push my monitors out of the way when I need more desk space. This flexibility is perfect for shared desks or hot-desking environments.
Note: If you work in retail or use your desk for multiple tasks, look for mounts that support accessories like POS trays or extra shelves. It helps your setup grow with your needs.
When I started shopping for a monitor mount, I noticed prices could be all over the place. Some basic mounts cost less than a nice dinner, while others felt like a real investment. I learned that the price usually matches the features and build quality.
Here’s a quick table I made to help compare what you get at each price level:
Price Level | Features | Typical Warranty |
|---|---|---|
$ | Basic tilt, fixed height, simple build | 1-2 years |
$ | Height adjust, some cable management | 3-5 years |
$$ | Full adjustability, better materials, USB | 5-10 years |
$$ | Premium ergonomics, dual arms, modular design | 10-15 years |
If you want advanced features like smooth height adjustment, USB ports, or support for two monitors, expect to pay in the moderate ($$) to premium ($$$$) range. I found that single monitor arms with top-notch ergonomics and customization can cost more, but they often come with long warranties—sometimes up to 15 years. Dual monitor arms with similar features also land in this price range and support screens up to 32 inches.
Tip: Decide which features matter most to you before setting your budget. Sometimes paying a bit more up front saves you headaches later.
I always look at value, not just price. A cheap mount might save money now, but if it wobbles or breaks, I end up spending more to replace it. I prefer mounts with sturdy materials and smooth adjustments. These feel better to use every day.
Warranty matters, too. I’ve seen premium mounts with warranties that last 10 to 15 years. That tells me the company stands behind its product. If something goes wrong, I know I’m covered. I also check what the warranty actually covers—some only protect against defects, while others include wear and tear.
Here’s what I ask myself before buying:
Does the mount feel solid and stable?
Will it fit my monitor and desk for years to come?
Is the warranty long enough to give me peace of mind?
A good monitor mount is an investment in comfort and productivity. I’d rather pay a little more for something that lasts and keeps my workspace working for me.
Before I install a monitor mount, I always take a few minutes to get ready. I start by reading the instructions from the manufacturer. I gather all the tools I need, like a screwdriver, measuring tape, and maybe a wrench. I clear off my desk so I have space to work. If I’m using a glass desk, I pay extra attention. Glass can crack if I’m not careful.
Here’s my checklist for glass desks:
I use a reinforcement plate to spread out the weight and protect the glass.
I place the monitor right above the clamp to keep pressure even.
I pick a mount that matches my monitor’s size and weight.
I avoid clamp mounts if I can, since they put too much force on a small area.
I check that the glass is thick enough for the mount.
I clean the glass before I start.
I double-check the weight limits for both the desk and the mount.
If I’m unsure, I ask a pro for help.
Tip: Always measure your monitor and desk before you buy or install a mount. This saves time and prevents headaches later.
When I first installed a monitor mount, I made a few mistakes. Over time, I learned what to watch out for. Here’s a table of the most common errors and why they matter:
Common Installation Mistake | Explanation & Impact |
|---|---|
Missing VESA Standard Interface | Some monitors don’t have VESA holes, so the mount won’t fit. |
Ignoring Weight Limitations | Heavy monitors can cause the arm to droop or break. |
Overlooking Screen Size Limitations | Big screens might overlap or not line up, especially with more than one monitor. |
Difficult Monitor Position Adjustment | Some mounts need tools for every adjustment, which gets annoying fast. |
Poor Cable Management | Messy cables make it hard to move the monitor and keep the desk tidy. |
Lack of Flexibility in Mounting Methods | Not all mounts work with every desk or wall, so I check before I buy. |
Improper Measurement of Monitor & Arm Length | If I don’t measure right, my setup might not work or look good. |
Note: Taking a few extra minutes to plan and measure can save you from these common problems.
When I pick a new setup, I always follow a simple checklist:
Check if my monitor is VESA compliant.
Count how many screens I want to use.
Confirm the weight and size of each monitor.
Measure my desk and workspace.
Choose the right mount type and adjustability.
Think about build quality and extra features.
Set a budget that fits my needs.
A good mount keeps me comfortable, safe, and organized. I hope this guide helps you find the perfect fit for your workspace!
I check the back of my monitor for four screw holes in a square pattern. I also look in the manual or on the manufacturer’s website. If I see “VESA” and a number like 100x100mm, I know it’s compatible.
I’ve used a freestanding mount on my glass desk. I avoid clamp or grommet mounts because they can crack the glass. If I must use a clamp, I add a reinforcement plate and check the glass thickness first.
I always check the mount’s weight limit before buying. If my monitor is too heavy, I pick a stronger mount. Using the wrong mount can damage both the monitor and the desk.
Most mounts only need a screwdriver and maybe a wrench. I read the instructions first and gather my tools. Some mounts even include the tools I need in the box.
Yes, I can. I look for dual monitor arms that support the size and weight of both screens. I check the specs to make sure the arm fits my monitors and my desk.


